Xilisoft iPhone Transfer Tutorial
Here we will show you how to transfer music, videos, photos, applications and other files among iPhone, PC and iTunes with Xilisoft iPhone Transfer step by step.
In general this article is divided several parts as below.
- Part 1: Copy files from PC to your iPhone
- Part 2: Backup iPhone files to local
- Part 3: Transfer iPhone files to iTunes
- Part 4: More Applied Functions
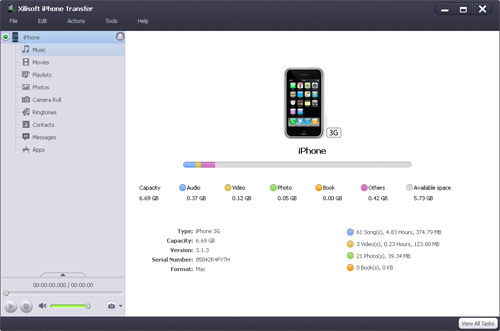
First, download Xilisoft iPhone Transfer, install and run it. Connect your iPhone to computer, the application will recognize the device automatically and displays the device information in the interface.
Part 1: Copy files from PC to your iPhone
This program helps you copy movies, music, books, photos and applications from local folder to iPhone without overwriting original iPhone files.
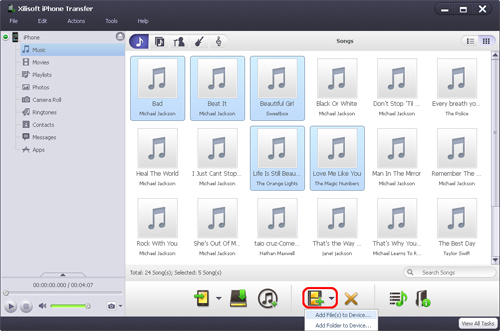
In the left directory tree, select the target device file list that you want to import files into. And then click "Add File(s) to Device…" drop-down button, choose "Add File(s) to Device..." option, select the files you want to add in the dialog box that appears, and load them to your device.
Tips:
(1) If you want to add a folder containing all files you want, please click "Add File(s) to Device" drop-down button, choose "Add Folder to Device..." option, and then load the folder you want to your device.
(2) The program allows you to transfer files by drag and drop. You can directly drag and drop files from local into the program to import them.
Part 2: Backup iPhone files to Computer
The program helps you transfer iPhone music, movies, books, photos and applications to PC for backup.
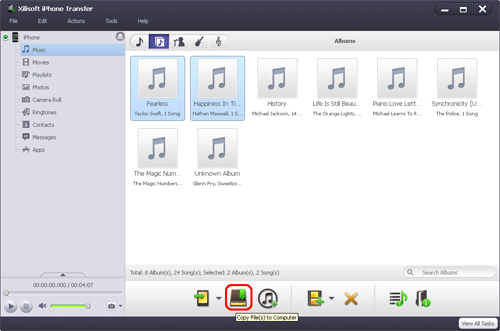
- In the left directory tree, choose the source file list from which you want to backup files to local. All files in the selected file list will be shown in the right list immediately.
- Select the wanted files in the right file list, click "Copy File(s) to Computer" at the bottom of the file list, and locate the target folder in the dialog box that appears, then start exporting.
Part 3: Transfer iPhone files to iTunes
This program allows you to transfer iPhone music, movies, books, photos and applications to iTunes for backup.
- In the left directory tree, choose the source music, movies and books list from which you want to transfer files to iTunes. All files in the selected list will be shown in the right file list immediately.
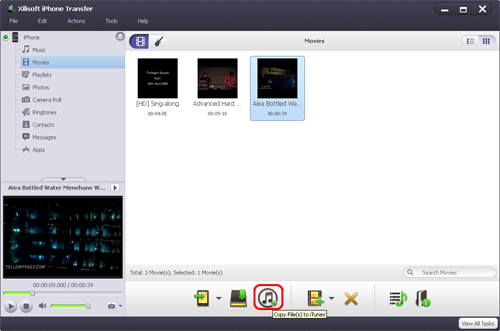
- Select the wanted files in the right file list, click "Copy File(s) to iTunes" button at the bottom of the file list to start transferring.
More Applied Functions
- Application documents management
The software supports document management for some applications.
Select "Apps" node from the left directory tree, and choose an application which supports documents management from the applications list in the right file list.
Click the up arrow button at the bottom to open "Documents Management" interface. Click "Add..." button to add local documents, choose the documents from list and click "Save..." or "Delete..." button to save or delete documents. - Add playlists to iTunes
You can add playlists to iTunes. Choose one device node and click "Playlists", all the playlists will be displayed in the file list. Choose one or more playlists, and click "Copy File(s) to iTunes" to start copying.
- Show media files in playlist
Choose one or more files in the file list, add the file(s) to other playlists by choosing "Add to Playlist" from right click menu.
Right click the file which has been added to the playlist; choose one playlist the file belonged from submenu of "Show in Playlist", and then it will skip to the playlist automatically. - Move media files from one playlist to another
Right click one or more media files in one playlist, and choose one playlist from submenu of "Move to Another Playlist", and then it will move to the target playlist automatically.
- Modify ID3 tag
You can modify ID3 tag info of one file in iPhone, and also modify ID3 tags of multiple files at the same time.
To modify ID3 tag of one audio file:
1. Locate the audio you want to edit in the right file list, and choose "Modify Info..." from the right click menu to open the " Modify Info" window.
2. Edit any information like "Name", "Artist", "Album", "Comments", "Years", "Genre", etc in the ID3 tags. Click "OK" to finish the editing.
To modify ID3 tags of multiple files at the same time:
1. Locate the audios you want to edit in the right file list, and choose "Modify Info..." from the right click menu to open the " Modify Info" window.
2. If the selected files have the same value in any field, then the program will show the value in the field, you can also click the field text box to change the field for multiple files simultaneously.
If the files have different values in the "Name", "Artist", "Album Artist", "Album", "Genre", "Rating" and "Year" fields, the program will show all the values in the field divided by semicolon, you can click the field text box to change the field for multiple files simultaneously.


